Before creating the app we need to create the database objects. The object creation script should be run in a schema with at least the privileges to create tables, views, sequences, procedures and triggers. In Oracle APEX add a workspace assignment for this schema.
Creating the application
Now we can create the application:- log into the APEX workspace
- open the App Builder
- hit the Create button
- Chose New Application
- Enter a Name for the application
- Change the Application ID if desired
- Select the schema with the objects as value for Schema
- Hit Create Application
Creating the pages
Create the List View and Form pages using the create page wizard:- Press Create Page
- chose Forms
- hit Report with List View on Table
- Fill in the following data:
- Report Page Number: 10
- Report Page Name: Activities
- Form Page Number: 15
- Form Page Name: Activity
- Press Next
- Check Create a new navigation menu entry and hit Next
- Chose the table ttm_activities_vw and press Next. We will replace this with a query later on.
- Check Select Primary Key Column(s) and select all columns in the shuttle.
- Select act_id for Primary Key Column 1
- Remove the column act_prj_name
- Hit the Create button
We can run the application and see how it looks:
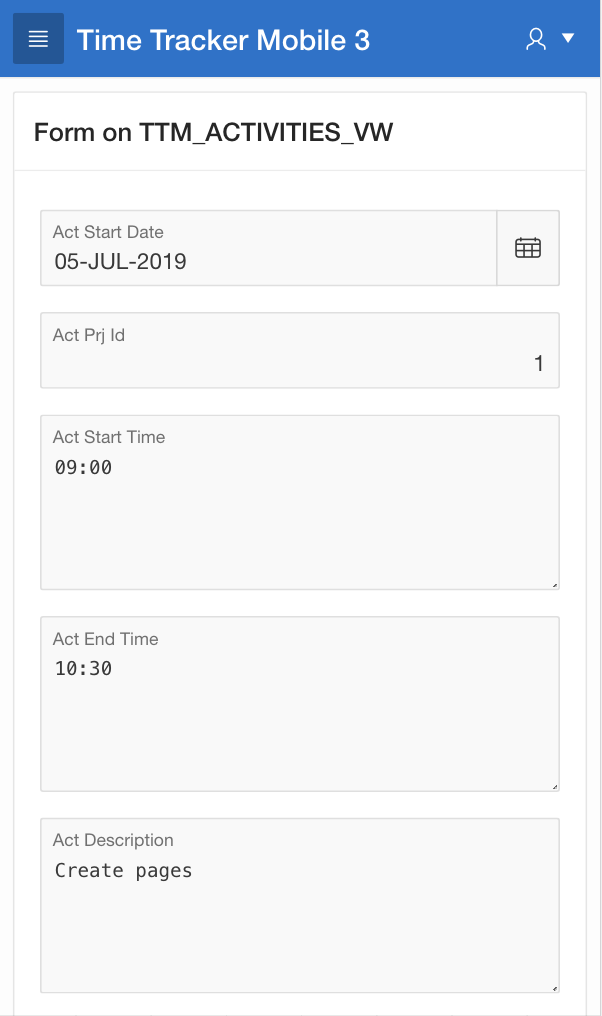

Now the pages have been created, but they do not function very well:
- the list view only shows ID’s
- the form page contains large fields with bad labels and a numeric project reference
Note that it is already possible to insert and update activities using the form page.
Improving the List View
To refine the list view open page 10:- Select the region List view
- Change the following values:
- Title: Activities
- Source > SQL Query:
, to_char(act_start_date,'fmDay, fmMonth fmddth yyyy ')
as start_date
, act_prj_name as project_name
, act_start_time
|| ' - ' ||act_end_time
|| ' ' ||act_description as details
from ttm_activities_vw act
order by trunc(act_start_date) desc, act_start_time
- Open the Attributes of the Activities region. In Settings:
- check Show List Divider
- uncheck Enable Search Search will be implemented later
- Text Column: PROJECT_NAME
- Supplemental Information Column: DETAILS
- List Divider Column: START_DATE

We have clear information about the activities and they are grouped and sorted in a useful way.
Some remarks about the changes on the list view page:
- the base query of the List View region provides the elements to be shown. For the second line the start time, end time and description are combined into one string, supplying a lot of information about the activity
- it shows how easy it is to define a list divider. Just check the Show List Divider box and supply the column
- the Search option is also very easy to define. Just check Enable Search and provide the column to be searched.It is possible to define whether the search is exact and how it handles case. The search column can be an existing column or a new column combining to be searched. The search option is disabled because the List View will show one week of activities based on a date picker item.
Refining the form page
Now we will improve the form page:- Open Page 15.
- Select the region Form on TTM_ACTIVITIES_VW
- Set Title to Activity.
- Change values for the items:
- P15_ACT_START_DATE:
- Label: Date
- P15_ACT_PRJ_ID:
- Type: Select List
- Label: Project
- List of Values:
- Type: SQL Query
- SQL Query: select prj_name, prj_id from ttm_projects order by 1
- P15_ACT_START_TIME
- Type: Text Field
- Label: Start time
- P15_ACT_END_TIME
- Type: Text Field
- Label: End time
- P15_ACT_DESCRIPTION
- Label: Description
- Appearance > Height: 2
- P15_ACT_LOCATION
- Type: Text Field with autocomplete
- Label: Location
- List of Values:
- Type: SQL Query
- SQL Query: select distinct act_location from ttm_activities order by 1
- On page 15 open the Process Tab
- Select Process form Activity
- In Settings:
- Lock Row: No
- Return Primary Key(s) after insert: No
When the form page is run the improvements become clear:

The labels are improved and the page fits on the screen. The Project name is shown and can be chosen using a select list. Entering the Location is supported by the auto complete functionality.
Some remarks about the changes on the form page:
- APEX uses the column names as labels. They usually need to be changed to some more useful text
- The form wizard creates Textarea items of 4 lines for most varchar2 columns. This takes a lot of vertical space and is not needed in most cases. In this case only the description is expected to need 2 lines. The type of the other items is changed to Text Field.
- To show the project name for selecting the project the item type is changed to Select List. For reasons of simplicity the LOV query is defined with the item instead of in the Shared Components.
- To implement the specified auto complete functionality the type of the location item is changed to Text Field with autocomplete. Now the location can be chosen from previously entered locations filtered by the text already entered. Note that the query only returns one column.
About the next post
In the next episode we will look at the general layout of the pages.
- Our own Theme Style will be applied
- The menu will be changed to a navigation bar
- Screen space will be used more efficient
- Page title will be placed in the top bar
2 comments:
Hi , I'm getting
ORA-22816: unsupported feature with RETURNING clause
Hi,
have you applied these settings to the save process?
Lock Row: No
Return Primary Key(s) after insert: No
Good luck,
Dick
Post a Comment